


What you'll need:
• a foam brush or two
• acrylic paints in your choice of colors
• scrapbooking rub-on decals
• candy corns and boozy cider for snacking (obviously)

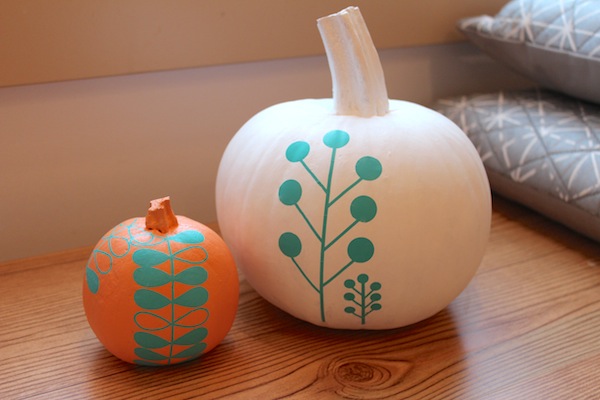
Pick your pumpkins! It's best to get the roundest, smoothest ones you can possibly find. I also wanted white "ghost" pumpkins but couldn't find them, so this is proof that orange is just as good with this project! Rinse the pumpkin to get any dirt or debris off, then completely dry with a towel.
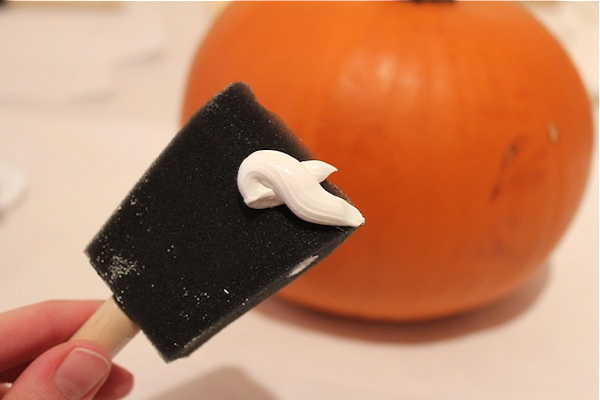
Use a foam brush to put several coats of acrylic paint (in your choice of colors) on the pumpkin. I used regular Liquitex Basics in white and salmon. Note: allow the paint to dry for at least 30 minutes per coat. This is really important when you start using the rub-ons, because I didn't and had a LOT of trouble with this. Learn from my impatience, folks. Do the stem last so that you have a dry place to hold the pumpkin at all times.

Now choose your rub-ons. There are a lot of cheesy ones out there, I know, but you can come across some great graphics if you look hard enough. We happened to have some in our old "craft pantry" here at Assemble from Hambly Screenprints in some modern "Lotta Jansdotter-esque" patterns. Perfect!
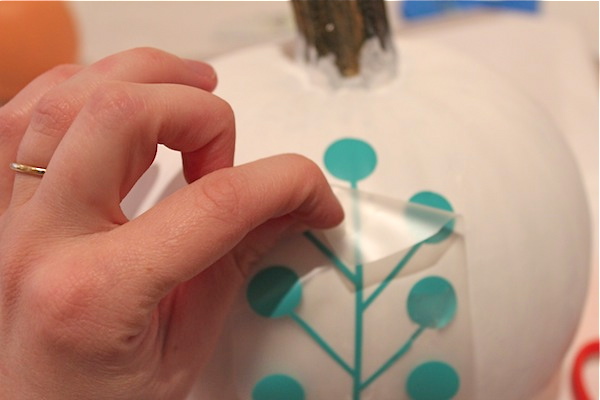
Okay, here's the hard part: keeping the decal in the same position while adhering it and avoiding tearing. I'm not going to lie: this was kind of difficult. My advice would be to focus on small areas first. Use a bone folder to scrape the backside of the decal to adhere it to the pumpkin while carefully pushing it off of the plastic. Use your fingertip to press the decal down and make sure it's fully adhered. If I was repeating this project, I might even cut the design into several pieces and do them separately. Meh, live and learn. Make sure you line up the design! And there you have it. Perfect, modern pumpi-kins!
